Picture a kid spending an entire afternoon trying to make a marble knock over a domino that tips a cup that rolls a ball down a ramp that rings a bell. They fail 20 times. 30 times. They keep a tally. They adjust the angle, move the domino closer, swap the cup for a lighter one.
And then it works. The marble hits the domino, the domino tips the cup, the cup rolls the ball, the ball slides down the ramp, and the bell rings. The scream of triumph is real. That moment of success after dozens of failures; that’s one of the proudest feelings a kid can have.
That’s a Rube Goldberg machine. And it’s the best STEM activity you’re probably not doing.
What is a Rube Goldberg machine, exactly?
Named after the American cartoonist who drew absurdly complicated inventions, a Rube Goldberg machine is a chain-reaction device that accomplishes a simple task through an elaborate series of steps. Think: a ball rolls down a ramp, hits a lever, which tips a bucket, which pulls a string, which turns on a fan, which blows a sailboat across a table.
The goal isn’t efficiency. The goal is the chain, the longer and more creative, the better. Every step transfers energy to the next, and the whole thing only works if every single connection succeeds. It’s engineering, physics, and creative thinking wrapped into one glorious, frustrating, deeply satisfying project. If it hooks your kid, our engineering challenges for kids post has 20 more builds in the same spirit.
Why it’s brilliant for learning
Kids learn more physics from one afternoon of Rube Goldberg tinkering than from any textbook explanation. Not because textbooks are bad, but because when the ramp is too steep and the ball shoots off the table, they understand momentum in their bones. When the domino chain stops because one piece is too far from the next, they feel what energy transfer means.
- Physics: gravity, momentum, energy transfer, friction, inclined planes, levers, pulleys
- Engineering: structural stability, cause and effect, sequential design, load bearing
- Maths: angles, distance, measurement, estimation, counting steps
- Persistence: troubleshooting, isolating problems, trying again (and again, and again)
- Creative thinking: using everyday objects in unexpected ways, improvising solutions
- Planning: sequencing steps, working backwards from the goal, managing complexity
But the biggest lesson is this: failure is the process. Not a detour from the process. The process. A Rube Goldberg machine doesn’t work the first time. Or the fifth time. Or the twentieth time. And every failure teaches something specific: this angle is wrong, this piece is too heavy, this connection is unreliable. Kids who build chain-reaction machines develop a relationship with failure that most adults never achieve, they see it as information, not defeat.
How to start simple (really simple)
Don’t start with a 15-step machine. Start with two steps. Literally: one thing causes another thing to happen. A domino falls and knocks over a cup. A ball rolls down a book and hits a toy car. That’s a chain reaction. That counts.
Once two steps work, add a third. Then a fourth. Build outward from success. This approach prevents the overwhelm that kills most Rube Goldberg projects before they start.
- 1Start with a simple goal: ring a bell, pop a balloon, knock something off a table, turn on a light
- 2Build the last step first, the part that accomplishes the goal
- 3Add one step before it. Get that connection working reliably
- 4Keep adding steps backwards, testing each connection as you go
- 5When the whole chain works end-to-end, celebrate loudly
Professional Rube Goldberg builders design from the end to the beginning. Start with what you want to happen last (the bell rings, the flag pops up) and work backwards, adding steps that lead to that moment. This keeps the goal clear and makes troubleshooting much easier.
Materials you already have
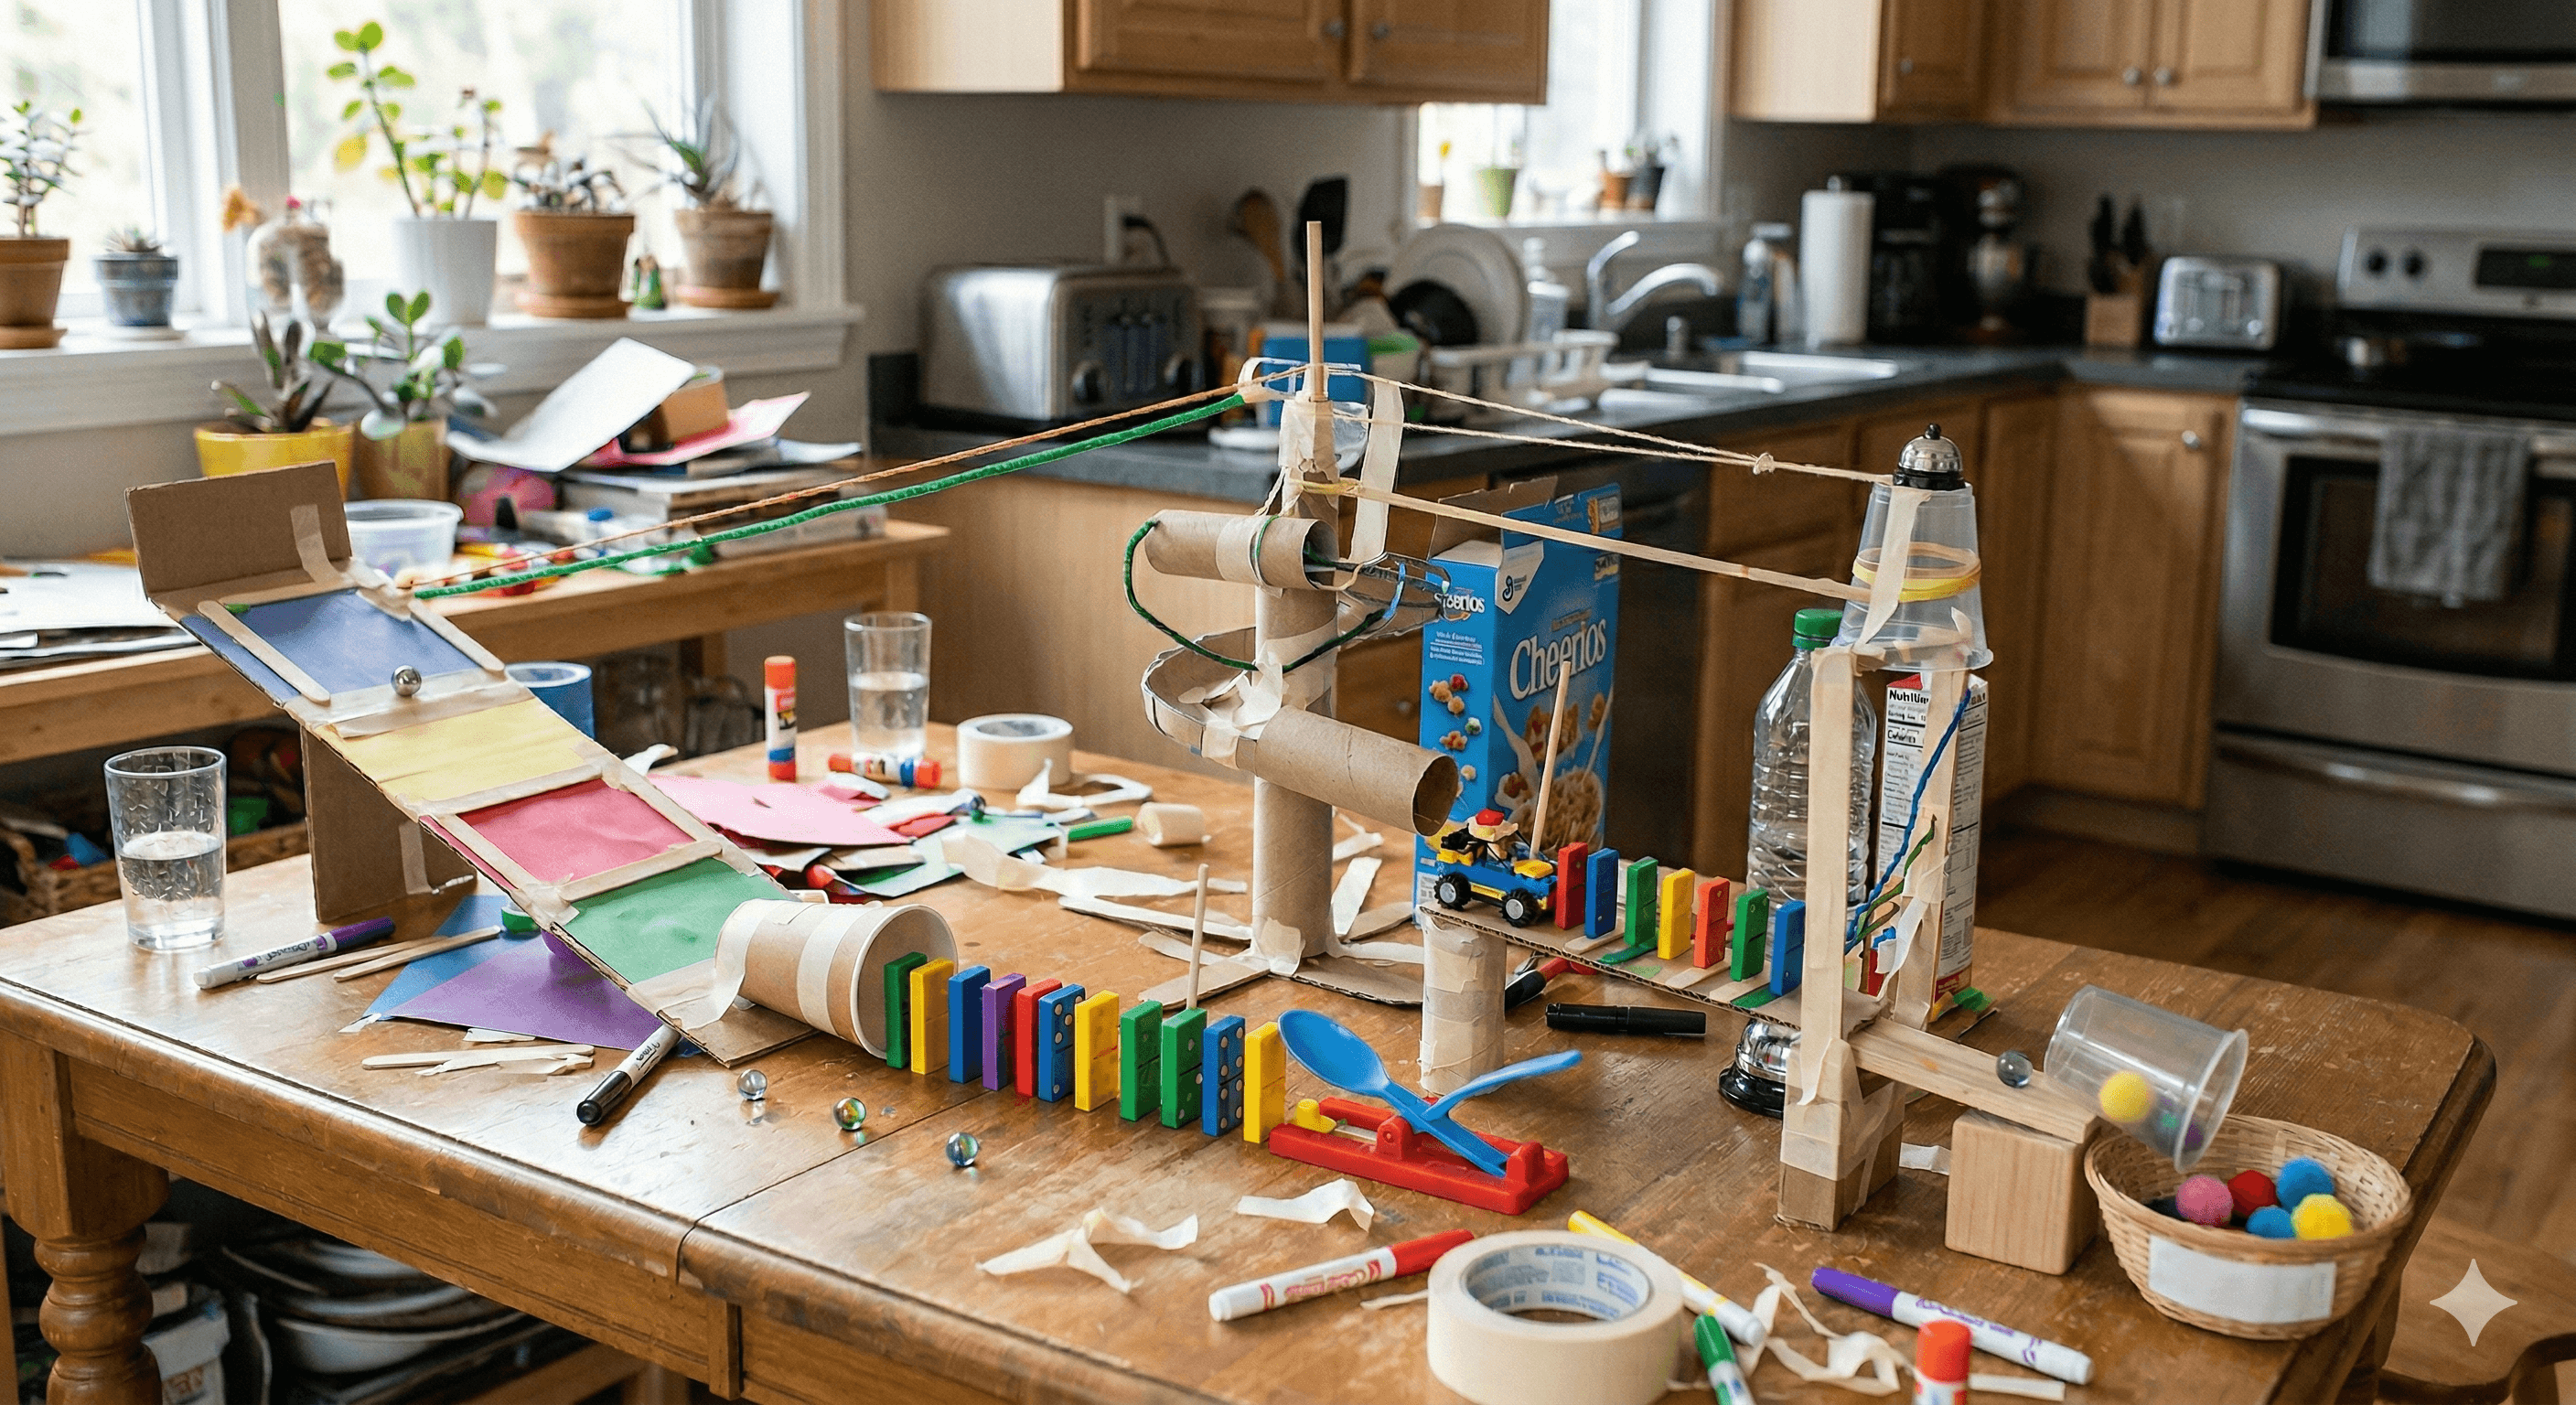
You don’t need a kit. You don’t need specialty materials. The whole point is using ordinary household items in extraordinary ways. Here’s what works:
- Dominoes (or books stood on end, or wooden blocks)
- Cardboard tubes (paper towel rolls, wrapping paper tubes), brilliant for ramps and tunnels
- Marbles, ping pong balls, golf balls, any round thing that rolls
- Books, cutting boards, or baking trays as ramps and inclined planes
- String, tape, rubber bands for connections and triggers
- Cups, bowls, buckets for catching, tipping, and funnelling
- Toy cars, small figurines, or anything with wheels
- A bell, a balloon, or a small flag for the grand finale
The stranger the materials, the more creative the thinking. One family in our community built an entire machine using only kitchen utensils. Another used LEGO, Hot Wheels track, and a water balloon. There are no wrong materials, only untested ideas.
20 chain-reaction steps you can build from the recycling
These are the building blocks. Pick a finish, pick five or six steps from the groups below, and chain them so each one’s ending is the next one’s start. A machine is just steps that hand off to each other, and the handoffs are where the physics lives.
Started by something rolling
- A marble down a ruler propped on two books, into a paper cup taped to a string, so the cup’s weight tugs the next trigger
- A toy car down a cutting-board ramp into a row of dominoes cut from a cereal box
- A ping pong ball through a paper-towel-tube tunnel that drops onto a spoon balanced across a can, flipping the spoon
- A golf ball rolling off the table edge into a bucket hanging on a string, so the bucket drops and pulls a lever
- A soup can rolling along the floor into a stack of cups, so the top cup falls onto whatever comes next
Started by something falling
- Dominoes (or books stood on end) that knock the last one into a cup on the table edge
- A book toppling off a stack onto a spoon, so the spoon flicks a bottle cap across the table
- A bag of rice dropping onto one end of a ruler seesaw, launching a bottle cap off the other end
- A marble dropping from a tube into a tray of water, so the splash soaks a paper flag that sags and releases a clip
- A domino falling onto a spoon-and-rubber-band catapult, firing a pom-pom into a cup on a ledge
Started by something tipping or swinging
- A cup on the table edge tipped by a domino, spilling a marble onto the next ramp
- A ball in a sock, hung from a chair on a string, swung into a tower of blocks
- A ruler seesaw with a marble sitting in a cup at one end; a weight lands on the other end and the marble flies
- A cereal-box door hinged with tape that swings open when a domino hits it, releasing the ball held behind it
- A half-full water bottle that tips when nudged, its cap tied to a string that drags a toy car forward
Started by a pull, a push or a puff of air
- A string over a chair back as a pulley: a falling weight on one end lifts a flag or a cup lid on the other
- A balloon rocket on a string across the room, released when a falling weight tugs the clip holding it shut
- A paper fan on a stick, swung by a falling book, that blows a ping pong ball off a bottle top
- A rubber band stretched between two pencils that flicks a bottle cap when a domino knocks one pencil away
- The finale: a bell on a string, rung by a cup that slowly fills with marbles until it is heavy enough to pull
Twenty steps is not a machine; five that hand off cleanly is. The handoffs are the hard part, and the reason the tip above says to build backwards from the finish. Every step that connects the ones around it is a small victory worth stopping for.
In the Membership
Build a Rube Goldberg Machine
STEM engineering project for kids ages 6-14: build an absurdly complicated machine to do something simple. Design thinking, cause-and-effect, and creativity meet.
Failure is the point (embrace it)
I need to say this clearly because it’s the most important thing about this activity: your child’s machine will fail. Repeatedly. Spectacularly. And that is not a problem. That is the entire point.
Every failure is a physics lesson. The ball rolled too fast? That’s momentum. The domino didn’t fall far enough? That’s energy transfer. The cup tipped the wrong way? That’s centre of gravity. Your child doesn’t need to name these concepts (though they can). They just need to experience them, observe what happened, and try a different approach.
The kids who stick with it, who try attempt 30, 40, 48, develop something more valuable than physics knowledge. They develop grit. Real grit, not the motivational-poster kind. The kind that comes from wanting something to work so badly that you’re willing to fail your way to success.
Every Rube Goldberg failure is a physics lesson in disguise. The ramp was too steep? That’s momentum. The domino didn’t reach? That’s energy transfer. Failure isn’t the problem. Failure is the curriculum.
Scaling by age
Ages 4–6: Knock-it-down chains
Young kids can line up dominoes or blocks in a chain and knock them down. That’s a Rube Goldberg machine in its simplest form. Help them add one more step, the last domino knocks a ball off the table into a bucket. Celebrate wildly.
Ages 7–9: Multi-step machines
This age group can build 5–10 step machines with ramps, levers, and rolling objects. They can troubleshoot individual connections and start to think about why things work or don’t. This is the age where the STEM learning really accelerates.
Ages 10+: Engineering challenges
Older kids can build 15+ step machines, incorporate pulleys and water, work with precise timing, and even film their machines for a satisfying slow-motion video. Challenge them to accomplish a specific task (pour a glass of water, turn the page of a book) in as many steps as possible.
Make it a family project
Some of the best Rube Goldberg machines are collaborative. Each family member designs and builds one section, then you connect them. This adds a new layer of challenge: your section has to work with someone else’s, which means communication, planning, and compromise.
Try it on a rainy weekend: each family member designs and builds one section, then you connect them into a machine that stretches across the living room. One person builds with books and toy cars. Another does a marble run with cardboard tubes. Someone else builds the grand finale. Connecting the sections is often harder than building them, and teaches everyone something about collaboration and systems thinking.
Film the final run. You’ll want to watch it again. Trust me.
If your family loves building and making things, a Rube Goldberg machine is the ultimate maker project. It’s open-ended, endlessly customisable, and works with whatever you have on hand. No kit required. No instructions to follow. Just physics, creativity, and the stubborn belief that attempt 48 might be the one that works.
Want this as a free printable? Grab the 26 Creative & Maker Ideas for Kids, free to read, and the printable version lands in your inbox.